How to Build A Longboard – Step-By-Step Guide
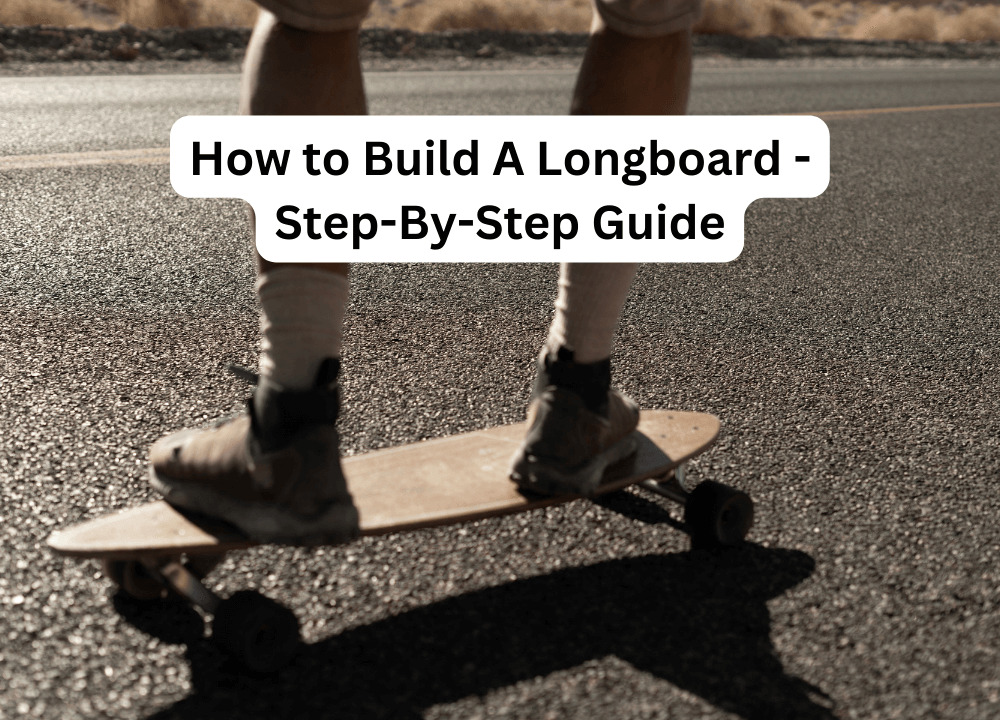
If you’re interested in longboarding, you may wonder how to build a longboard. Longboards are a great way to commute and have fun. They’re also a great way to get around campus if you’re a student. Building a longboard is a great way to get exactly your desired board.
You can customize the dimensions, the bottom shape, the concave, and more. Plus, you can choose your own trucks, wheels, and bearings. Making a longboard is not difficult, but it requires patience and attention to detail. So, in today’s post, we’ll walk you through building a longboard step-by-step.
How to Build a LongBoard?
Creating your custom longboard may be enjoyable, and building one is typically less expensive than buying one. To make your board, you’ll need some woodworking tools, some experience with cutting wood, a little ingenuity, and a lot of drive. Ask a buddy, a parent, or a skate shop employee for assistance if you need it.
A suitable board is essential to gain experience in longboarding or skateboarding. Although there are many locations to get one, building your longboard is the best method to acquire the board you want. This post is for you if you enjoy making your improvements. It will show how easy constructing a typical longboard at home is. In this blog post, we’ll walk you through building a longboard step-by-step. So let’s begin the longboard-making process.
1. Prepare the tools, materials, and hardware
Material
Make sure there are all the necessary supplies and equipment ready. You must have the required supplies and tools to start any DIY project. All the materials are simple and easy. Just remember that hardwood is more trustworthy. Several types of wood, including oak, walnut, and maple, are suitable.
Skateboard Hardware.
You’ll also need to prepare the polyurethane (Spray Can), wood glue, black spray paint, and adhesive.
Tools
Tools like clamps, sandpaper, printer, utility knives, pencils, screwdrivers, TableSaw, Jointer, Chisel, Spokeshave, Photoshop, and planer will also be necessary. Band Saw, Spokeshave,
Bench vice and Inventables would be helpful
2: Create the Panel and Set the Hardware
You’ll use a flat hardwood panel to cut the skateboard deck because you are already ready to cut the deck. Cut the strips to about four inches long using a saw according to your measurements. If you like flat, then cut hardware strips flat and square. The hardware circus should be perfectly straight and uniform. Running them across the jointer will separate them permanently. It will be perfectly straight and smooth. Additionally, the table saw can tear all the strips to the same width.
After that, attach them all with clamps and leave them to dry completely. Scrape any dried glue using a chisel when the glue is dry. After that, you can plane the panel to make it flat. The panel can be smoothed with a hand plane if a planer is unavailable. You must attach the wheels’ bearings at this stage. A spacer should be placed between the two bearings. Having one bearing on each side of the wheel and space between them is good practice. After that, connect a nut to the truck’s end to fix the wheel. It’s crucial to dial it. The wheels won’t spin or wobble if it is too tight or loose, respectively.
3: Figure Out the Deck Shape
The form of a longboard can vary. If you need to clarify your preferred format, pick a shape that suits your tastes online. To make a longboard, you must have a good idea of how to build and shape it. To make a beautiful and strong longboard, Use Any design program software to create a layer and give it a gorgeous outline.
When it comes to living boards or skateboards, there are many shapes and types of them, and we don’t know which type we want to make, so we will search on Google and get the one we like. And will create your living board accordingly. Therefore, this article will discuss creating a longboard with any form.
You can search for an image of this shape in different ways. Create a Layer and give it a lovely outline using any design program software. Print it out when ready, then tape it on the table. After that, set the skateboard trucks in place, align them with the drawing’s location, and square them up so they are centered using a ruler.
A pencil can be used to trace the holes. After that, carefully cut out the shape with a knife after taping the deck outline in place.
4: Create the shape and Artwork on the Deck
Now we create the shape and artwork on the deck.
We wanted to carve the bottom of the longboard deck before cutting the outer profile. Using the panel’s straight edges, we first performed this to check that the board was square to the work table. However, to see where we wanted the carving to go, we did trace the deck’s outline onto the panel.
Your imagination and expertise are the key components of this process. A suitable machine, a stencil, or a screen-printing process can all be used to carve the bottom.
However, you must first decide on the artwork, carve it, and then use sandpaper around each line to ensure a smooth surface with no scratches. It can be painted to give it a more fashionable and bright appearance.DRememberto uses a razor blade to scrape off any remaining paint from the surface and to pass it through the planer.
5: Finishing the Longboard Deck
Making your longboard is relatively easy. You can clear up all the sawdust and sand the entire area to 320 grit before completing the surface. The majority of users like to use longboards for outside activities. Therefore it may come into contact with dirt, water, gravel, etc. Consequently, we advise choosing a finish with urethane. Apply several coats of it to your board using a spray can. Ensure that it also appears in the carving. Use a brush or rag instead of a rush can if you don’t have one.
6: Add the Grip-tape and Hardware
Grip tape is a good addition. When you are riding, It keeps you firmly attached to the board. It may be rolled onto the deck. When completely secured, rub the deck’s edges with a firm surface. After that, use a razor blade to trim off all the extra glue. The trucks should then be positioned and secured with the hardware. Now it’s ready for your trip. After rolling out and putting the grip tape down, we had to remove the air bubbles. We tried several methods before deciding on using a block of wood. It will be even simpler if you already have specific tools. We hope you complete your longboard project and enjoy making it.
Conclusion
A longboard can be as straightforward or complex as the user desires. You decide whether the deck should be painted entirely with an excellent design, printed with writing and graphics, or be a single solid color. Your preferred combination of aluminum trucks, wood decking, and rubber wheels is available. Utilize our advice on constructing a longboard to get more satisfaction from this fun sport. Make your longboard with confidence after having no prior experience.